


.svg)


Tile Spacers Guide: What Size to Use, How to Place, and Why It Matters
Achieve perfect tiling with tile spacers for consistent grout lines. Select 1mm for modern, seamless looks, 2mm for all-purpose projects, 3mm for striking patterns, or 4mm for robust floors. Proper planning and spacer placement prevent errors like misaligned tiles. This guide covers sizes, techniques, and pitfalls to avoid, ensuring a polished, long-lasting finish for walls, floors, or outdoor spaces with ease.
By Aditi

Tue , Oct 07 , 2025
4 min read

Ever wondered why some tiled walls look sleek and flawless while others seem uneven and sloppy? The secret often lies in a tiny piece of plastic, i.e., the tile spacer. Though small, spacers are the backbone of a neat tiling job, creating perfectly even gaps between tiles so grout can settle properly. Skip them, and you risk crooked lines, cracked tiles, or a finish that looks rushed. Use them, and suddenly your tiles align like a designer’s blueprint. In a bathroom, kitchen, or on the floor, tile spacers keep the pattern consistent and the finish clean for tiles. In this guide, we’ll walk you through the sizes, placement techniques, and the big reasons why these little tools matter.
What Are Tile Spacers and Why Do They Matter?
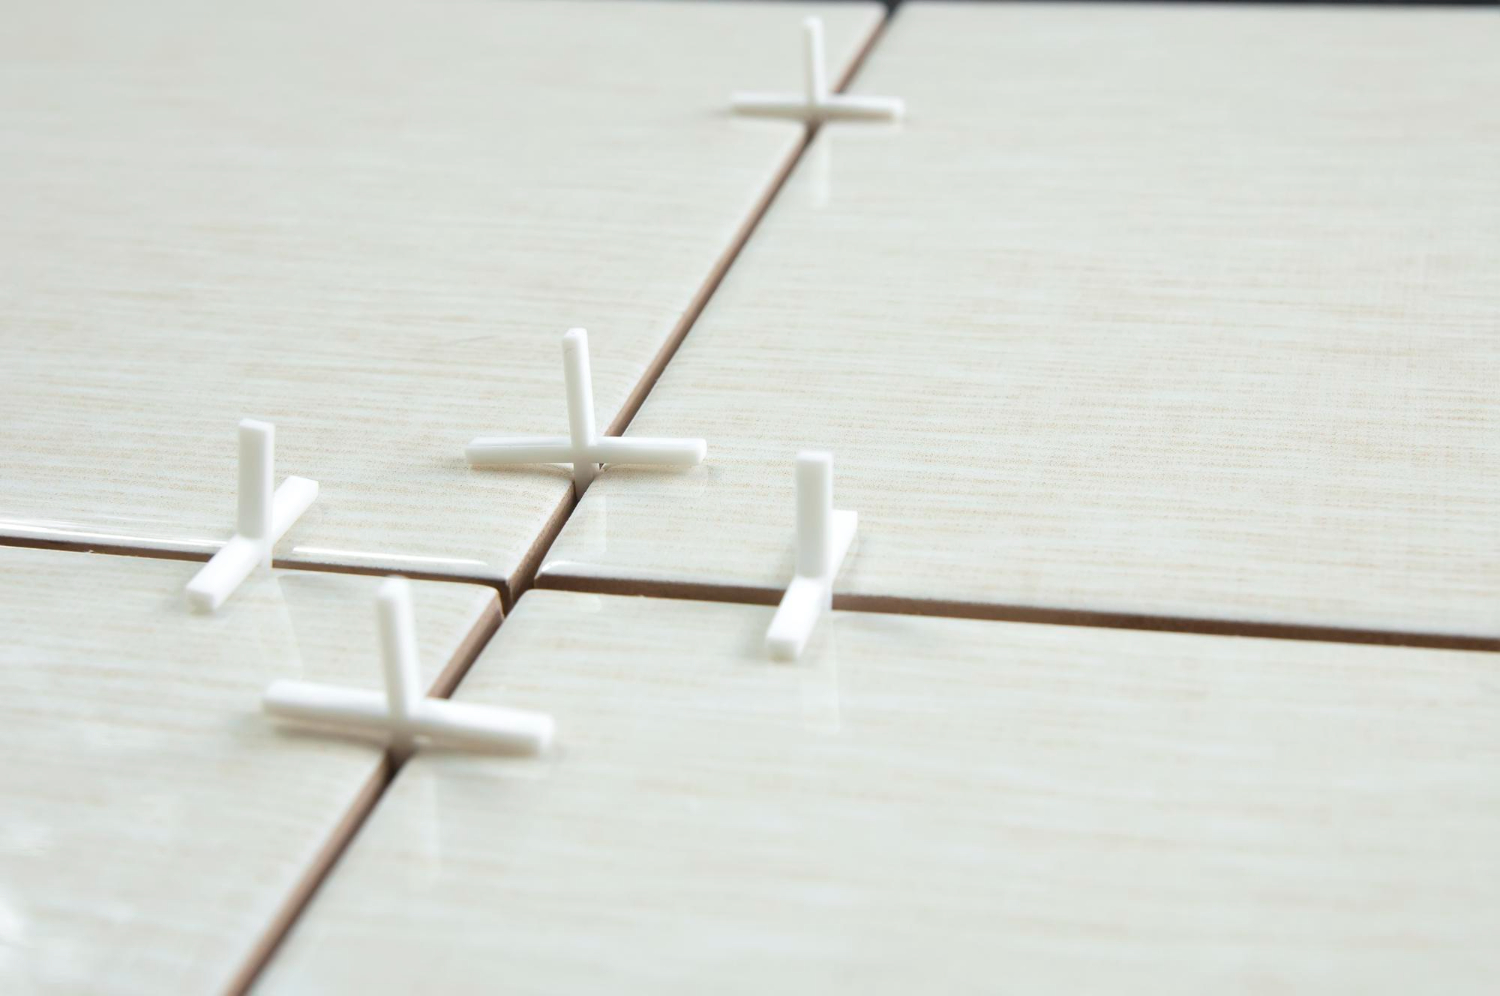
Tile spacers are small plastic pieces shaped like crosses, T’s, or wedges. Their job is simple but essential: they create uniform gaps between tiles so grout can fill in evenly. These gaps are not just about looks; they allow tiles to expand and contract with temperature changes, preventing cracks or lifting over time. Without spacers, you risk uneven joints, awkward cuts, and an unprofessional finish.
Choosing the right size depends on the style you want and the type of tile being used. Smaller joints give a sleek, modern look, while wider ones highlight rustic or patterned tiles. Using spacers also saves you time because you don’t have to constantly measure or adjust each tile. In short, spacers ensure balance, beauty, and durability in every tiling project.
Tile Spacers Sizes: Choosing the Right One for Your Project
When it comes to tiling, even a few millimeters can make a huge difference. That’s why picking the right tile spacer size is so important. Each size creates a different effect, sleek and modern, balanced and clean, or bold and rustic. The choice also depends on tile size and placement. Here’s a simple breakdown of common spacer sizes and how they can transform the final look of your project.
1mm Tile Spacers
1mm tile spacers are the smallest and give tiles a sleek, modern finish. They leave only a very thin gap, making the joints almost invisible. This style is great for walls, backsplashes, or areas where you want tiles to look like one smooth surface. With such close spacing, the grout line is minimal, keeping the design clean and simple. If you like a polished, seamless style with very little interruption, 1mm spacers are the right choice for your project.
2mm Tile Spacers
2mm tile spacers are the most popular because they work in almost every tiling job. They provide just the right amount of gap; not too narrow, not too wide. This size is perfect for medium wall or floor tiles, as the grout lines are neat but still visible enough to define the layout. The look stays balanced and professional, without distracting from the tiles themselves. If you’re unsure about what to use, 2mm spacers are a safe, all-round option.
3mm Tile Spacers
3mm tile spacers create a gap that is slightly wider, which makes grout lines stand out more. This is a good choice when you want to highlight each tile individually, especially for rustic, patterned, or decorative tiles. The extra room also adds strength because thicker grout joints can handle more stress in busy areas. With this size, tiles don’t just blend into one another; they stand out, giving the surface character and a more eye-catching, defined style overall.
4mm Tile Spacers
4mm tile spacers are best when you’re working with large tiles or uneven areas. The wider gap allows more adjustment during placement, which helps prevent cracking later on. This size is commonly used for floors that need to handle heavy use, as well as patios and outdoor projects. The grout lines are thick and bold, making the surface look strong and structured. If you want durability along with a clear, statement-making design, 4mm spacers are the right choice.
How to Use Tile Spacers: A Step-by-Step Guide
While using tile spacers isn't difficult, understanding the correct procedures is crucial. Think of them as tiny guides that help you lay tiles straight, keep grout lines even, and achieve a polished finish. Without them, tiles can shift, gaps may look uneven, and the final result won’t feel as professional. This step-by-step guide walks you through the whole process in plain language, so you can tile with confidence and enjoy a surface that looks neat and lasts longer.
Step 1: Plan Your Layout
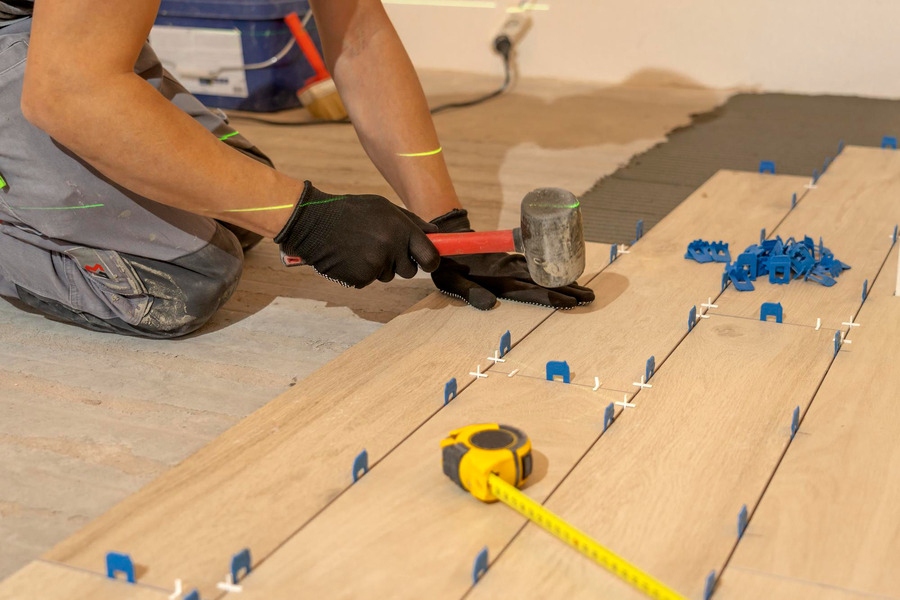
Before you even think about floor or wall tile spacers, plan how your tiles will sit. Dry-lay a few tiles on the floor or wall to figure out your pattern and where you’ll need cuts. Use a measuring tape to find the center of the room or wall and mark a starting point, usually a straight line or cross in the middle. This helps ensure your tiles are symmetrical and you avoid tiny, awkward cuts at the edges.
Step 2: Prepare Your Surface and Adhesive
Make sure your surface is clean, dry, and flat. Any bumps or dirt can mess with how your tiles sit. Mix your tile adhesive or thin-set mortar according to the package instructions; aim for a peanut butter-like consistency. Spread it evenly over a small section (about 2-3 square feet) using a notched trowel. Hold the trowel at a 45-degree angle to get consistent ridges.
Step 3: Place Your First Tile
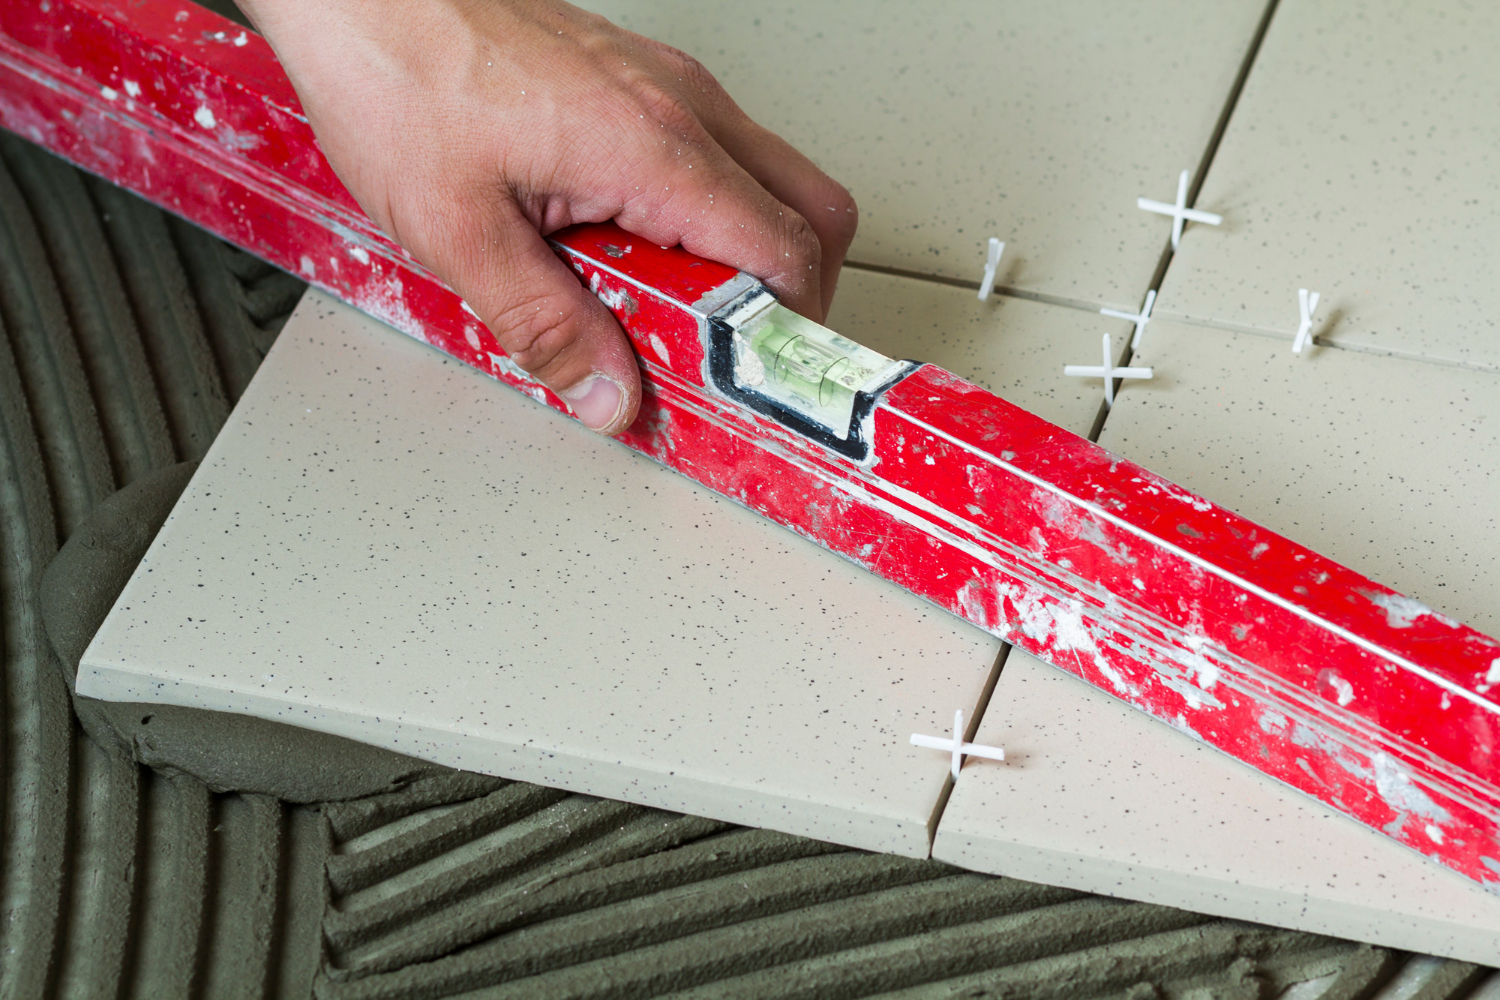
Set your first tile down at your starting point, pressing it gently but firmly into the adhesive. Wiggle it slightly to make sure it’s fully set. Use a level to check that it’s flat and even. This first tile is key; it sets the tone for the whole project.
Step 4: Add Tile Spacers
Here’s where the magic happens! Grab your tile spacers (make sure they match the grout line width you want). For most projects, 1/8” spacers work great for a clean, balanced look. Place the spacers at the corners where your tile meets the next one. For standard square tiles, you’ll typically put spacers at all four corners. If you’re using rectangular tiles or a staggered pattern, you might only need them along the sides.
Push the spacers in so they’re snug against the tile edges. Some spacers are “X” or “T” shaped; use “X” for corners where four tiles meet and “T” for edges or staggered layouts. Stand them upright in the adhesive so they don’t get buried.
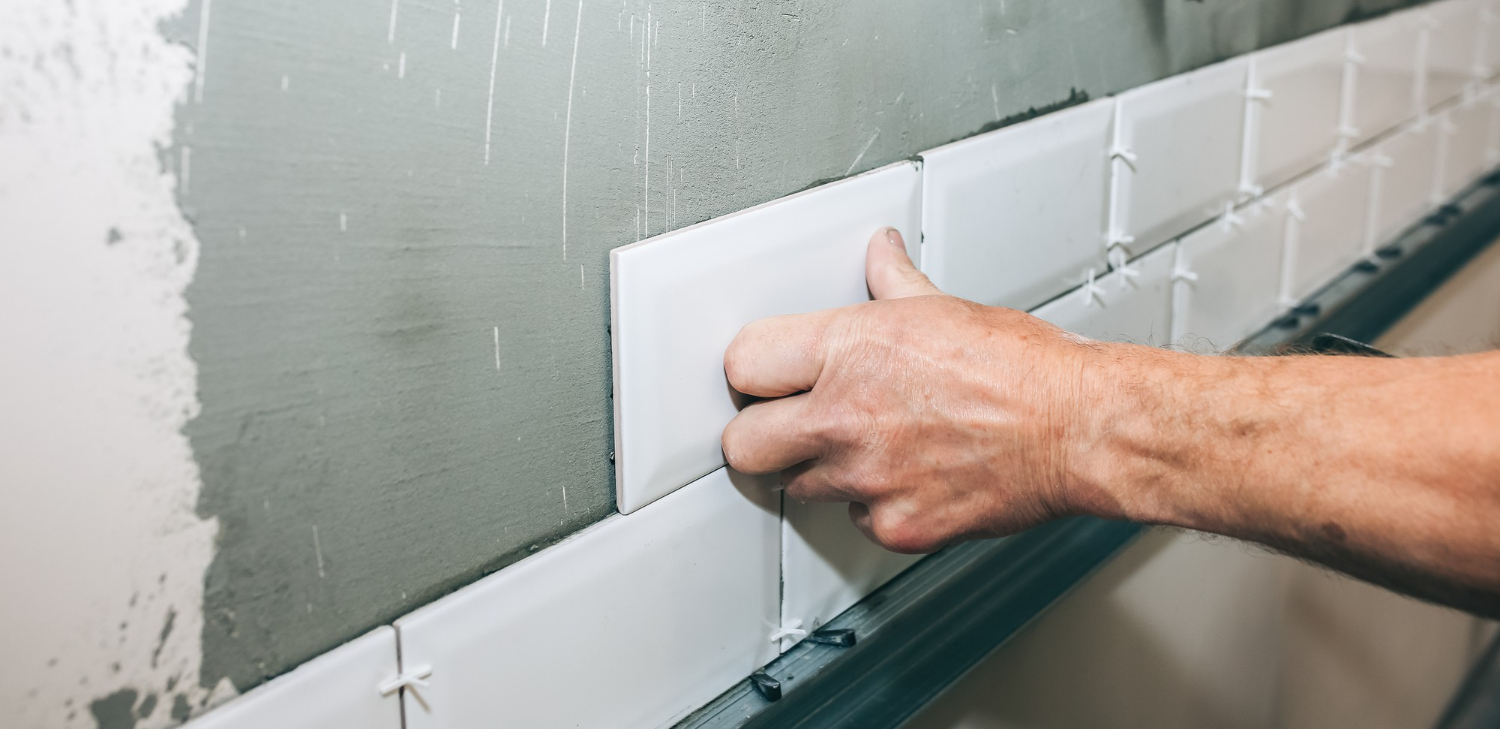
Step 5: Lay the Next Tiles
Place the next tile, lining it up with the spacers to keep the gap consistent. Press it into the adhesive, wiggle it, and check with a level. Repeat this process, working in small sections so the adhesive doesn’t dry out. Keep adding spacers as you go, making sure they’re secure and aligned.
If you’re working with larger tiles, consider using a tile leveling system alongside spacers to prevent lippage (when one tile sits higher than another). This is especially handy for uneven surfaces.
Step 6: Check Your Work
Every few tiles, step back and eyeball your lines to make sure everything’s straight. Use a level or a straightedge to double-check. If something looks off, now’s the time to nudge tiles or adjust spacers before the adhesive sets. Clean any adhesive that squeezes up between tiles with a damp sponge as you go.
Step 7: Cut Tiles as Needed
When you hit edges, corners, or obstacles (like outlets or pipes), measure and cut tiles to fit. A tile cutter or wet saw works best for clean cuts. Place the cut tiles with spacers just like the full ones to maintain consistent grout lines.
Step 8: Let the Adhesive Set
Once all your tiles are down, let the adhesive cure, usually 24 hours, but check the product instructions. Avoid walking on floor tiles during this time. You can usually remove spacers after 12-24 hours, depending on the adhesive. Gently pull or twist them out; they should come free easily if the adhesive hasn’t fully hardened.
Step 9: Grout and Finish
Once the adhesive has cured and the tile spacers are taken out, you can begin grouting. Prepare the grout as directed on the package and spread it with a rubber float, pressing it firmly into the joints at roughly a 45-degree angle. Use a damp sponge to wipe away any extra grout, rinse the sponge frequently for a clean finish. Allow the grout to set for about 24–48 hours, and apply a sealer if additional protection is desired.
What Is a Tile Leveling System?
A tile leveling system is a tool used during tile installation to ensure tiles are perfectly flat and aligned, preventing uneven edges (known as lippage). It typically consists of clips, wedges, or spacers that lock tiles in place as the adhesive sets, keeping them level across the surface. Tile leveling clips are positioned beneath the tiles, and wedges or caps are tightened to create uniform pressure. This process helps achieve a flat, seamless surface, giving the installation a professional finish. Such systems are particularly helpful when working with large-format tiles or slightly uneven subfloors, as they save time and minimize the need for repeated adjustments. They’re widely used by both DIYers and pros for floors and walls, complementing tile spacers for a flawless result.
Where Can We Use Tile Spacers?
Tile spacers are versatile and can be used in various tiling projects to maintain consistent grout lines. Here are key places where they shine:
- Floors: In bathrooms, kitchens, or living rooms, spacers ensure even gaps for grout, creating a polished look on ceramic, porcelain, or stone tiles.
- Walls: Perfect for kitchen backsplashes or bathroom walls. Kitchen or bathroom tiles with spacers keep tiles aligned, especially in patterns like subway or herringbone.
- Showers: Shower tile spacers maintain uniform grout lines in wet areas, ensuring durability and a clean aesthetic.
- Countertops: For tiled countertops, spacers help achieve precise alignment, enhancing both function and style.
- Outdoor Areas: Use spacers for patios or walkways to keep tiles evenly spaced, accommodating grout or sand joints.
Spacers work with most tile types and patterns, from small mosaics to large-format tiles, and are essential for any project where consistent grout lines matter.
Common Tile Spacer Mistakes and How to Avoid Them
Tile spacers may look simple, but using them the wrong way can leave you with crooked lines, messy joints, or even cracked tiles later on. The good news is these mistakes are easy to avoid once you know what to watch out for. By paying attention to spacer size, placement, and timing, you can keep your tiling project neat, balanced, and long-lasting. Here are the most common errors people make with spacers, along with simple tips to prevent them.
Mistake | Description | How to Avoid |
Using Wrong Spacer Size | Choosing spacers too large or small (e.g., 1/16” for bold looks, 1/4” for sleek) disrupts grout line consistency or design. | Select spacer size based on tile type and aesthetic. Test with a dry layout to confirm the look before starting. |
Not Planning Layout | Skipping a dry layout leads to uneven spacing or awkward cuts, especially in complex patterns like herringbone. | Dry-lay tiles, mark the center with a chalk line, and plan the pattern to ensure spacers align and cuts are minimal. |
Misplacing/Forgetting Spacers | Incorrectly placed (e.g., flat) or missing spacers cause uneven gaps or shifting tiles, ruining grout lines. | Stand spacers upright in adhesive at tile corners, checking each tile to ensure spacers are secure and present. |
Leaving Spacers Too Long | Spacers left until adhesive fully hardens are hard to remove, risking tile or grout line damage. | Gently twist or pull spacers out after 12-24 hours, when adhesive is partially set, per product instructions. |
Ignoring Tile Leveling | Relying only on spacers can lead to lippage, especially with large tiles on uneven surfaces. | Use a tile leveling system with spacers for large tiles; clips and wedges ensure a flat, aligned surface. |
Not Checking Alignment | Failing to check alignment causes crooked lines, which are difficult to fix once the adhesive sets. | Use a level or straightedge every few tiles, step back to inspect grout lines, and adjust spacers or tiles promptly. |
Adhesive Drying on Spacers | Dried adhesive on spacers makes them hard to remove or reuse, affecting grout lines. | Wipe adhesive off spacers and tiles with a damp sponge as you work, keeping a water bucket handy. |
Once your tiles are in place, dealing with leftover adhesive is the next step. If you’re not sure how to handle it, check out our guide on the best ways to remove tile adhesive from floors and walls, where you’ll also discover the different types of tile adhesive commonly used.
Flawless Tiling Starts with Spacers
Tile spacers are your secret to flawless grout lines and a pro-level tiling finish. Pick 1mm for sleek, seamless walls, 2mm for versatile projects, 3mm for bold, defined tiles, or 4mm for durable floors to match your style. Plan your layout, place spacers carefully, and check alignment to avoid uneven gaps or lippage. With attention to detail, your tiles will dazzle. For premium spacers and tiles, visit MyTyles. Our high-quality products simplify the tiling process and guarantee stunning, long-lasting results. Shop with us now to bring your vision to life!
FAQ
Q. What happens if I don’t use tile spacers?
Ans: Without spacers, tiles may shift, creating uneven grout lines or misaligned patterns. This can lead to an unprofessional look, weak grout joints, or tile damage. Use spacers to ensure consistent gaps and a polished, durable finish.
Q. Can tile spacers be reused for multiple projects?
Ans: Yes, most spacers are reusable if cleaned properly. Remove adhesive residue with a damp sponge before it hardens, and store them carefully to maintain their shape for future tiling jobs.
Q. How do I choose between X and T spacers?
Ans: X spacers are ideal for corners where four tiles meet in a grid pattern. T spacers work best for offset or staggered layouts, like brick patterns, ensuring proper alignment at tile edges.
Q. Are tile spacers necessary for large-format tiles?
Ans: Yes, spacers are crucial for large tiles to maintain even gaps, especially since small misalignments are more noticeable. Pair them with a leveling system to prevent lippage for a flawless result.
Q. Do bathroom spacers need to be waterproof?
Ans: Spacers themselves aren’t waterproof, as they’re removed before grouting. Choose durable plastic bathroom tile spacers that withstand adhesive moisture during installation. The grout, not the spacer, provides the waterproof seal in bathrooms.
Q. Can I remove tile spacers before the adhesive sets?
Ans: It’s best to wait 12-24 hours until the adhesive is partially set. Removing spacers too early risks tile movement, leading to uneven gaps. Follow adhesive instructions for timing.
Q. Do tile spacers work with all tile materials?
Ans: Yes, spacers work with ceramic, porcelain, stone, and glass tiles. Ensure the spacer size matches the tile’s edge type (rectified or non-rectified) for consistent grout lines.
Q. How do I handle spacers in complex tile patterns?
For patterns like herringbone or chevron, use T or wedge spacers and plan the layout carefully. Dry-lay tiles first to test spacing and ensure the pattern aligns before applying adhesive.
Q. Can spacers help with uneven surfaces?
Ans: Spacers maintain grout line consistency but don’t address surface unevenness. Use a leveling system alongside spacers to ensure tiles sit flat, especially on bumpy floors or walls.
Q. How do tile leveling spacers differ from regular spacers?
Ans: Tile leveling spacers use clips and wedges to keep tiles flat and aligned, preventing lippage, while regular spacers only ensure consistent grout gaps. Ideal for bathroom floors or large tiles, they ensure a smooth, durable surface.
Q. What’s the smallest spacer size available?
Ans: 1mm spacers are the smallest, ideal for a near-seamless look on walls or backsplashes. They create minimal grout lines, perfect for modern designs with rectified tiles.
Q. Do spacers affect the drying time of adhesive?
Ans: Spacers don’t directly impact adhesive drying time, but improper placement can trap adhesive, slowing curing in spots. Ensure spacers are clean and correctly positioned to avoid delays.
Q. Can I use spacers for outdoor tiling projects?
Ans: Yes, spacers are great for outdoor patios or walkways, especially 3mm or 4mm sizes for thicker grout lines that handle weather-related expansion. Ensure spacers are durable for outdoor use.
Q. How do I know if my spacers are high quality?
Ans: High-quality spacers are uniform in size, made of sturdy plastic, and easy to insert/remove. Check for consistent thickness and no warping.